Many drywall problems can be repaired without tearing out the entire wall. The right repair depends on what caused the damage, how far it extends, and whether the surrounding drywall is still solid.

Drywall ceiling hole and patch repair in Dallas — 

from small damage to large access openings. Send a photo and we’ll tell you what it needs.

.

Not Every Wall Problem Needs New Drywall
Wall Holes

Small and medium holes can often be cut back to solid edges, reinforced with backing, patched, finished, and blended into the surrounding wall.


Plumbing, Electrical & HVAC Openings

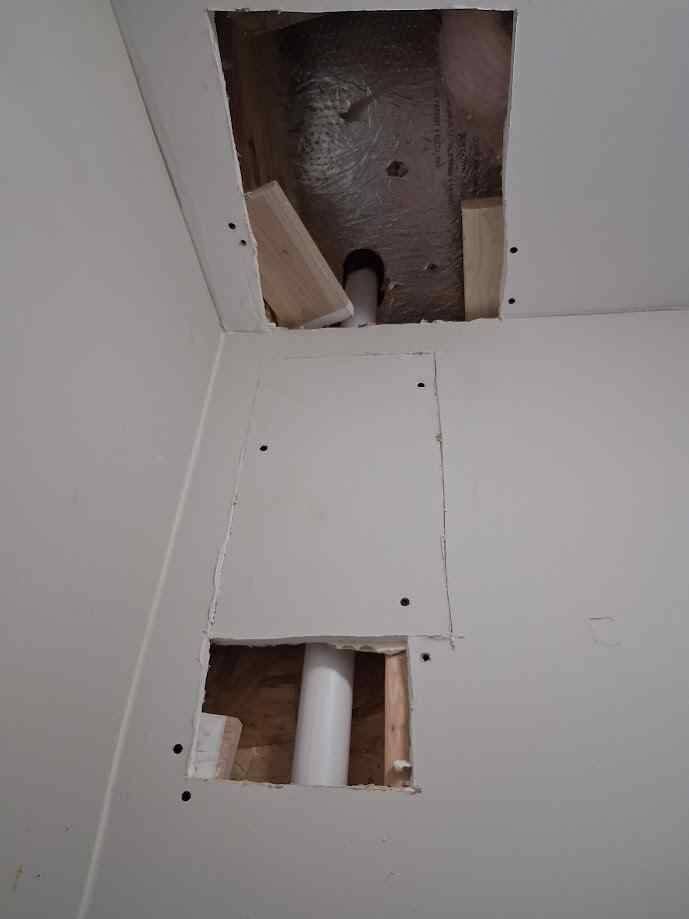
If another trade opened the wall to reach pipes, wiring, or ductwork, the opening can usually be closed once their work is complete. We rebuild the drywall, tape and finish the repair, then prepare it for paint.


Failed Previous Patches

A bad patch does not automatically mean the whole wall is bad. Loose material can often be removed and the repair rebuilt correctly with better backing, tape, feathering, texture, and preparation.


Cracks

Not every crack means the drywall needs replacement. Some are caused by movement, failed tape, previous repairs, or normal settling. The damaged joint can often be opened, reinforced, and refinished instead of replacing the entire wall.

Water-Damaged Drywall

Water damage needs more investigation. If the leak has been corrected and the damage is isolated, only the affected drywall may need replacement. If moisture, deterioration, or contamination extends farther into the wall, the repair scope may need to increase.

Damaged Corners & Seams

Loose tape, cracked corners, and failing seams can often be repaired locally. We remove unstable material, reinforce the problem area, and refinish it into the surrounding surface.


Texture Damage

A wall can still be structurally sound even when the texture is damaged or mismatched. In many cases, we can repair the affected area and match the surrounding finish as closely as practical.

Drywall access holes in a wall and ceiling exposing plumbing pipes before repair, showing areas opened for plumbing work and ready for drywall patching and finishing.

Wall opened for plumbing access before drywall repair

Ceiling Hole Repair

Damaged section removed, opening rebuilt, finished, textured, and blended back into the existing ceiling.

 Before-and-after ceiling hole repair in a Dallas garage, showing damaged textured drywall opened near the attic access and the repaired ceiling patched, finished, and texture-matched.

When Replacement Makes More Sense

Full or larger-section replacement becomes the better option when damage is widespread, the drywall has lost strength, moisture problems remain active, framing or concealed damage is involved, or repeated repairs have already failed.


ceiling hole repair

To repair small holes, follow our guide below

🟢 Small dry wall hole repair (Smaller than a dime)

Common Causes: Nail holes, screw holes, picture hook marks.

🔧 What You Need:

  • Spackling paste (or lightweight joint compound)

  • Putty knife (2" to 4")

  • Fine-grit sandpaper (120-220 grit)

  • Damp cloth

🪛 Steps:

  1. Clean the Area:
    Wipe away any dust around the hole with a damp cloth so the spackling sticks better.

  2. Apply Spackling Paste:
    Use the putty knife to scoop a small amount of spackle. Press it into the hole and spread it flat across the wall. Try to feather out the edges so it blends with the wall surface.

  3. Let it Dry:
    Allow the patch to dry completely. This may take about 30 minutes to a few hours depending on product instructions.

  4. Sand Smooth:
    Once dry, lightly sand the area until it feels smooth and level with the surrounding wall.

  5. Wipe Clean:
    Wipe the dust away with a damp cloth before painting.

Medium Holes


  • Apply a self-adhesive patch over the hole. Cover with joint compound and smooth it out. Let it dry, then sand.

    Large Holes:


    • Cut a piece of drywall to fit the hole.
    • Attach it to the wall with drywall screws.
    • Apply joint compound, tape the seams, and smooth it out.
    • Let it dry and sand.

    Send Us the Damage

    Take 2–3 photos of the hole or damaged area. Include one close photo and one showing the surrounding wall or ceiling. We'll help determine whether it needs a patch, a larger repair, or replacement.

    See wall or ceiling damage?
    We Fix sagging seams, stress cracks, and water stains professionally


    We’ll help determine whether it needs a patch, a larger repair, or replacement.